Setup Guide
Follow These Steps to Configure Your System
Click any section to expand the full instructions. Screenshots included for every step.
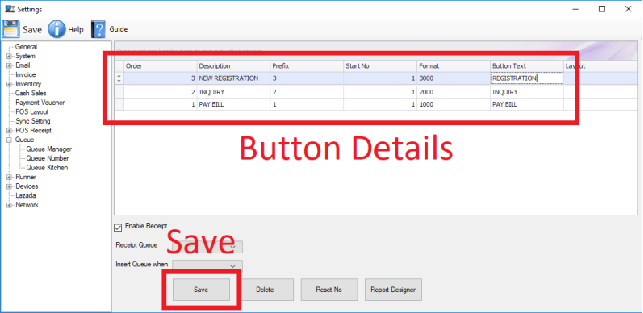
Step 1 — Setting Up the Queue Number Station
Configure service type buttons on the ticket dispenser so customers can select their service and receive the correct queue ticket.
- 1 Start BMO Client Software on the dispenser device
- 2 Click Settings from the main menu
- 3 Navigate to Queue → Queue Number
- 4 Click Add New to create a Queue Button
- 5 Enter the service name (e.g. "Consultation", "Payment")
- 6 Repeat for each service type required
- 7 Click Save to apply all settings
Step 2 — Using the Queue Number Station
How customers and staff use the dispenser daily — from login to ticket dispensing.
- 1 Start BMO Client Software
- 2 Select Queue Number Module
- 3 Enter your Username and Password
- 4 Click Login
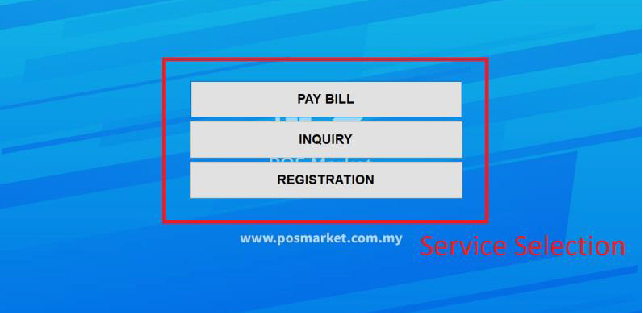
- 5 Customer presses their service button
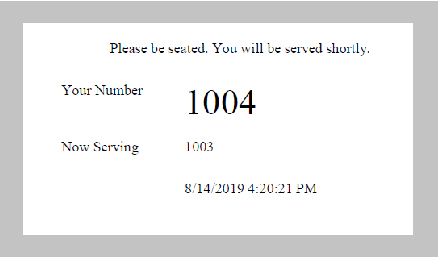
- 6 Printer automatically prints the queue number ticket
Step 3 — Setting Up the Queue Display
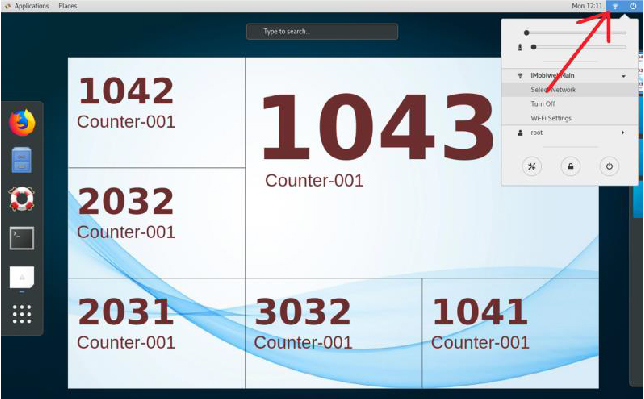
Connect the QD-100 display device to any TV via HDMI and configure it to communicate with your Queue Manager server.
- 1 Plug QD-100 into TV via HDMI cable and power on
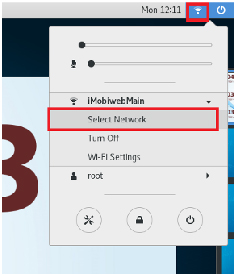
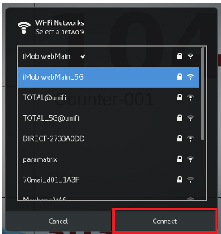
- 2 Press Win-Key → Select Network → connect to WiFi
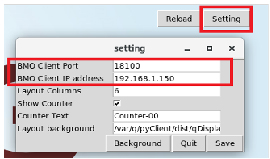
- 3 Open Queue Display Settings
- 4 Set BMO Client Port to 18100
- 5 Enter the Queue Manager device IP Address
- 6 Click Save
- 7 Restart the QD-100 device — display goes live
Step 4 — Customise the Display Layout
Personalise your waiting room display with your company branding, background image, and preferred layout style.
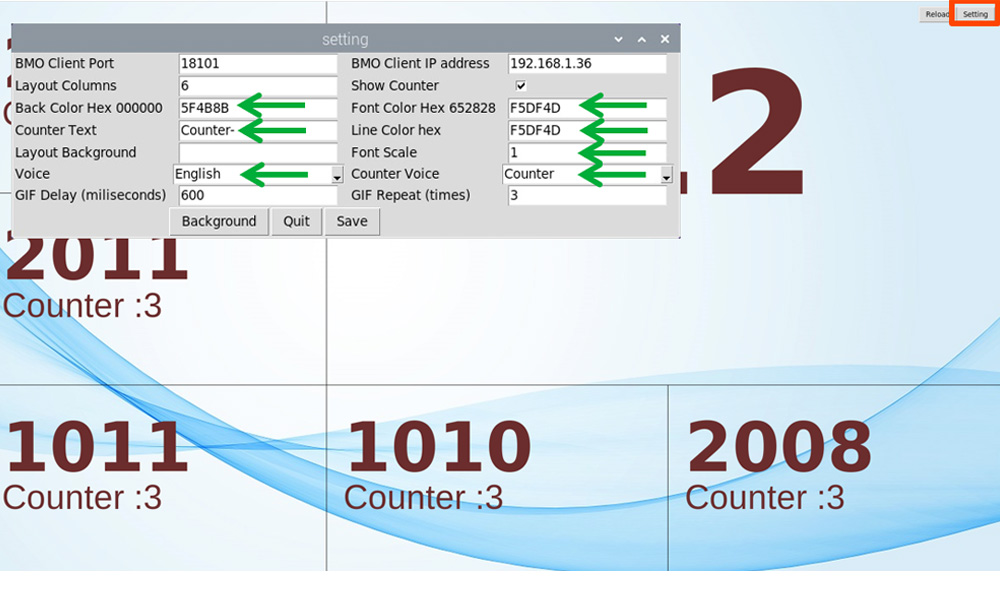
- 1 Open Queue Display Settings → Layout
- 2 Choose from available pre-built layout templates
- 3 Upload your company logo or background image
- 4 Adjust font size and colour settings
- 5 Enable YouTube embed for waiting area video (optional)
- 6 Save and preview on TV display
Step 5 — Setting Up Queue Manager on Each Counter
Install the Queue Manager software on each service counter PC. Counter staff use this to call, skip, push, and manage all queue actions.
- 1 Install BMO Queue Manager on the counter PC
- 2 Enter server IP address in the connection settings
- 3 Log in with the assigned counter username and password
- 4 Press NEXT to call the next customer
- 5 Use SKIP for absent customers, PUSH to transfer
- 6 All actions are logged automatically in reports
Need Professional Setup?
Our team handles the entire installation — hardware, network, display, and staff training. Available in KL, Penang, and Johor.